Fonts shape how your website looks and feels. The right choice improves readability and strengthens your brand identity. Most users judge a website’s credibility based on its design, and typography plays a major role in that perception.
Sticking with the default WordPress font might not always be the best option if you want a unique and polished design.
- What Are Web Fonts?
- How to Change a Font in WordPress?
- Method 1: Changing Fonts in WordPress Using the Theme Customizer
- Method 2: Changing Fonts Using Full Site Editing (FSE) in WordPress
- Method 3: Changing Fonts Using the Block Editor in WordPress
- Method 4: Using a Plugin to Change Fonts in WordPress
- Method 5: Manually Adding a Custom Font in WordPress
- Additional Tips on How to Change a Font in WordPress
- Quick Reference: Ways on How to Change a Font in WordPress
- Putting It All Together: Your Guide to Change Fonts in WordPress
- FAQs
Luckily, updating fonts in WordPress is simple. You don’t need to be a developer or touch a single line of code. This guide walks you through 5 easy methods on how to change a font in WordPress, helping you create a site that looks professional and matches your style.
Let’s first understand what web fonts are before exploring the methods.
What Are Web Fonts?
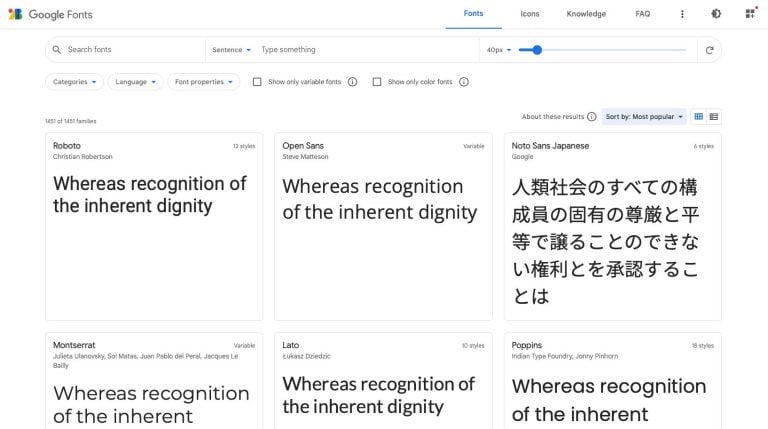
“Web fonts are fonts that load from the internet instead of being stored on a user’s device. This allows websites to display custom typography without relying on system-installed fonts.”
Google Fonts, Adobe Fonts, and FontSpace are popular sources that provide a variety of styles for different design needs. When properly optimized, web fonts load quickly and maintain consistency across devices and browsers.
Types of Web Fonts
- TrueType Fonts (TTF): A standard font format that works on both desktop and web applications. It offers broad compatibility across different platforms.
- OpenType Fonts (OTF): A more advanced version of TTF with additional typographic features, such as ligatures and alternate characters.
- Web Open Font Format (WOFF): Specifically designed for web use, this format is compressed for faster loading without sacrificing quality.
- Embedded OpenType Fonts (EOT): Developed by Microsoft for Internet Explorer, but it’s now mostly replaced by WOFF due to better browser support.
Understanding web fonts clearly will make it easier to choose the right method for changing fonts in WordPress.
Now, let’s explore the different ways to do it.
How to Change a Font in WordPress?
Fonts play an important role in defining your website's style and user experience. The typeface you choose influences how visitors perceive your site and interact with your content.
Visitors may quickly leave if your font is hard to read or out of sync with your brand identity. Ensuring your text is legible and reflects your brand’s personality helps with engagement and retention.
WordPress sites come with default fonts, sizes, and colors set by your selected theme. However, customizing these settings is often necessary to align with your unique design preferences.
The good news is that changing fonts in WordPress is simple and can be done in multiple ways. Below are five effective methods for updating your font settings and enhancing your website's overall look and feel.
Here’s a quick overview of the methods on how to change a font in WordPress:
- Changing Fonts in WordPress Using the Theme Customizer
- Changing Fonts Using Full Site Editing (FSE) in WordPress
- Changing Fonts Using the Block Editor in WordPress
- Using a Plugin to Change Fonts in WordPress
- Manually Adding a Custom Font in WordPress
Let’s explore each method in detail.
Method 1: Changing Fonts in WordPress Using the Theme Customizer
WordPress makes it easy to adjust fonts directly from the Theme Customizer, a tool designed to simplify site personalization. If you’re working with one of the latest themes, the Customizer provides a simple way to tweak font settings.
However, remember that different themes offer unique features, meaning the location of certain settings can vary.
In some cases, you might need to dig through menus or submenus to find the exact font options. If you can’t locate the Customizer, it’s possible that your theme uses full site editing. In that case, you may need to explore other methods or switch to a different theme.
Here’s how to change the font in a WordPress theme through the WordPress Theme Customizer:
1. Log In to Your WordPress Dashboard
Start by logging into your WordPress admin panel.
2. Navigate to Appearance > Customize
Find the Appearance tab on the left-hand menu, then click on Customize to access the Theme Customizer.
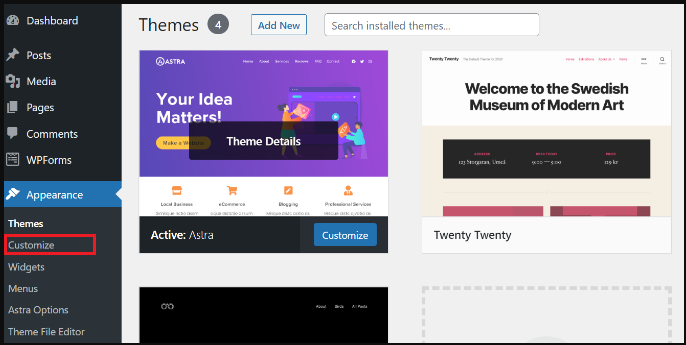
3. Open the Typography Section
Once the Customizer screen loads, click on the Typography option. This will bring up two main choices: Font Manager and Add Typography.
- Font Manager: You can select a font by clicking the dropdown menu. You can either scroll through the available fonts or search for a specific one. After you find your font, click Add Font to apply it to your site. Repeat this process to add more fonts for use in different areas.
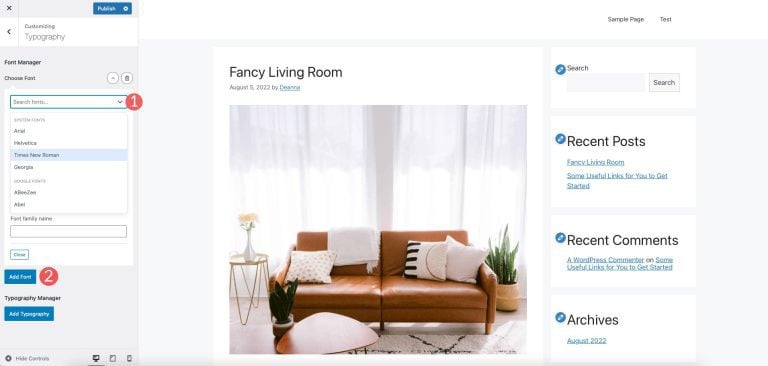
- Typography Manager: After adding your fonts, the Typography Manager allows you to assign specific fonts to different site elements, like headings, body text, or the site description. Select an element, pick your desired font, and customize its weight, size, line height, and letter spacing.

4. Save and Preview Changes
As you make changes, a live preview will show you how the new fonts look on your site. Once satisfied, click Publish to save your updates.
It's important to note that the available font options will vary based on the theme you’re using. Some themes provide a limited selection, while others offer a broader range of fonts for customization.
With these steps, you can easily manage and change fonts in WordPress sites using the built-in Theme Customizer.
Also Read: How to Enable GZIP Compression for WordPress to Optimize Site Speed.
Method 2: Changing Fonts Using Full Site Editing (FSE) in WordPress
If you're using a block-based theme like Twenty Twenty-Two, WordPress offers a handy way to modify fonts through the Full Site Editor (FSE). This method is straightforward, but only a few themes (including Twenty Twenty-Two) currently support it since FSE is still in beta.
Here's how you can get started with changing fonts using FSE:
1. Access the Editor
Go to your WordPress dashboard and navigate to Appearance > Editor. This opens up the Full Site Editor, where you can make changes to your theme’s appearance in a block-based environment.

2. Open Style Settings
You'll see the Style icon on the editor's left side. Click it to access your theme's style settings. From here, select the Pen icon to modify these settings and adjust the typography.
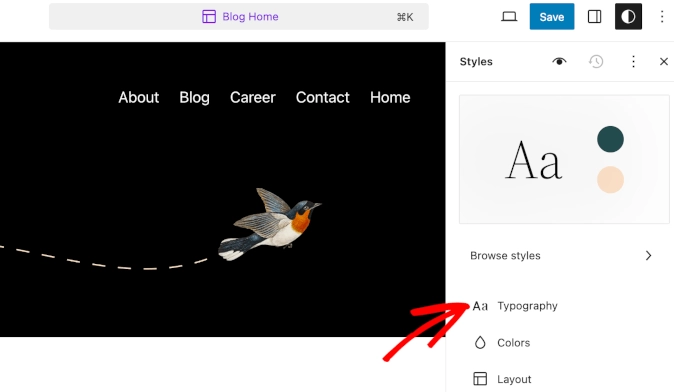
3. Customize Typography
You can modify various text elements across your site in the typography section. For example, you can change site text or link text to suit your design preferences.
4. Choose and Modify Fonts
Under the typography settings, select a font from the list using the Font Family dropdown menu. You can even upload custom fonts if the default options don’t meet your needs.
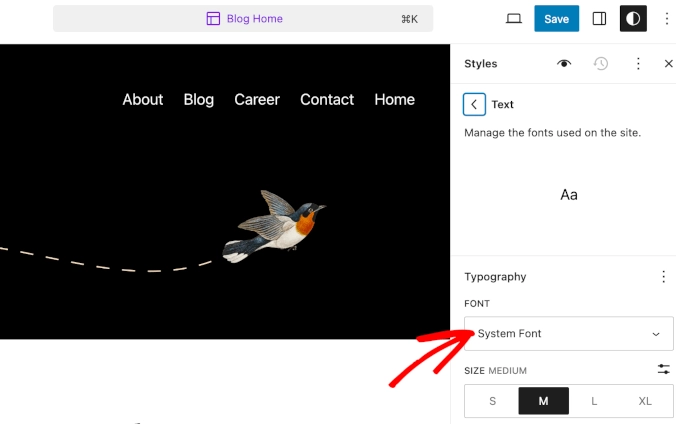
5. Adjust Font Appearance
Beyond selecting a font, you can tweak the font size, line height, and other aspects of text styling to improve readability and overall appearance.
6. Save Your Changes
Once you’ve made the changes, hit the Save button at the top right corner to apply the new font settings.
This method works well if you want to change fonts site-wide without needing additional plugins or coding. It also provides a user-friendly and more authoritative way to adjust typography while working within the Full Site Editor.
Method 3: Changing Fonts Using the Block Editor in WordPress
The Block Editor in WordPress offers a practical way to change your site's fonts without needing additional tools. It allows you to easily adjust text size, color, and appearance. This method can be useful for fine-tuning individual posts or pages to ensure your typography matches your content's style.
Follow these steps to change the font in WordPress using the Block Editor:
1. Access the Block Editor:
Navigate to the WordPress dashboard and go to Settings > Writing. From here, open the post or page where you want to change the font.
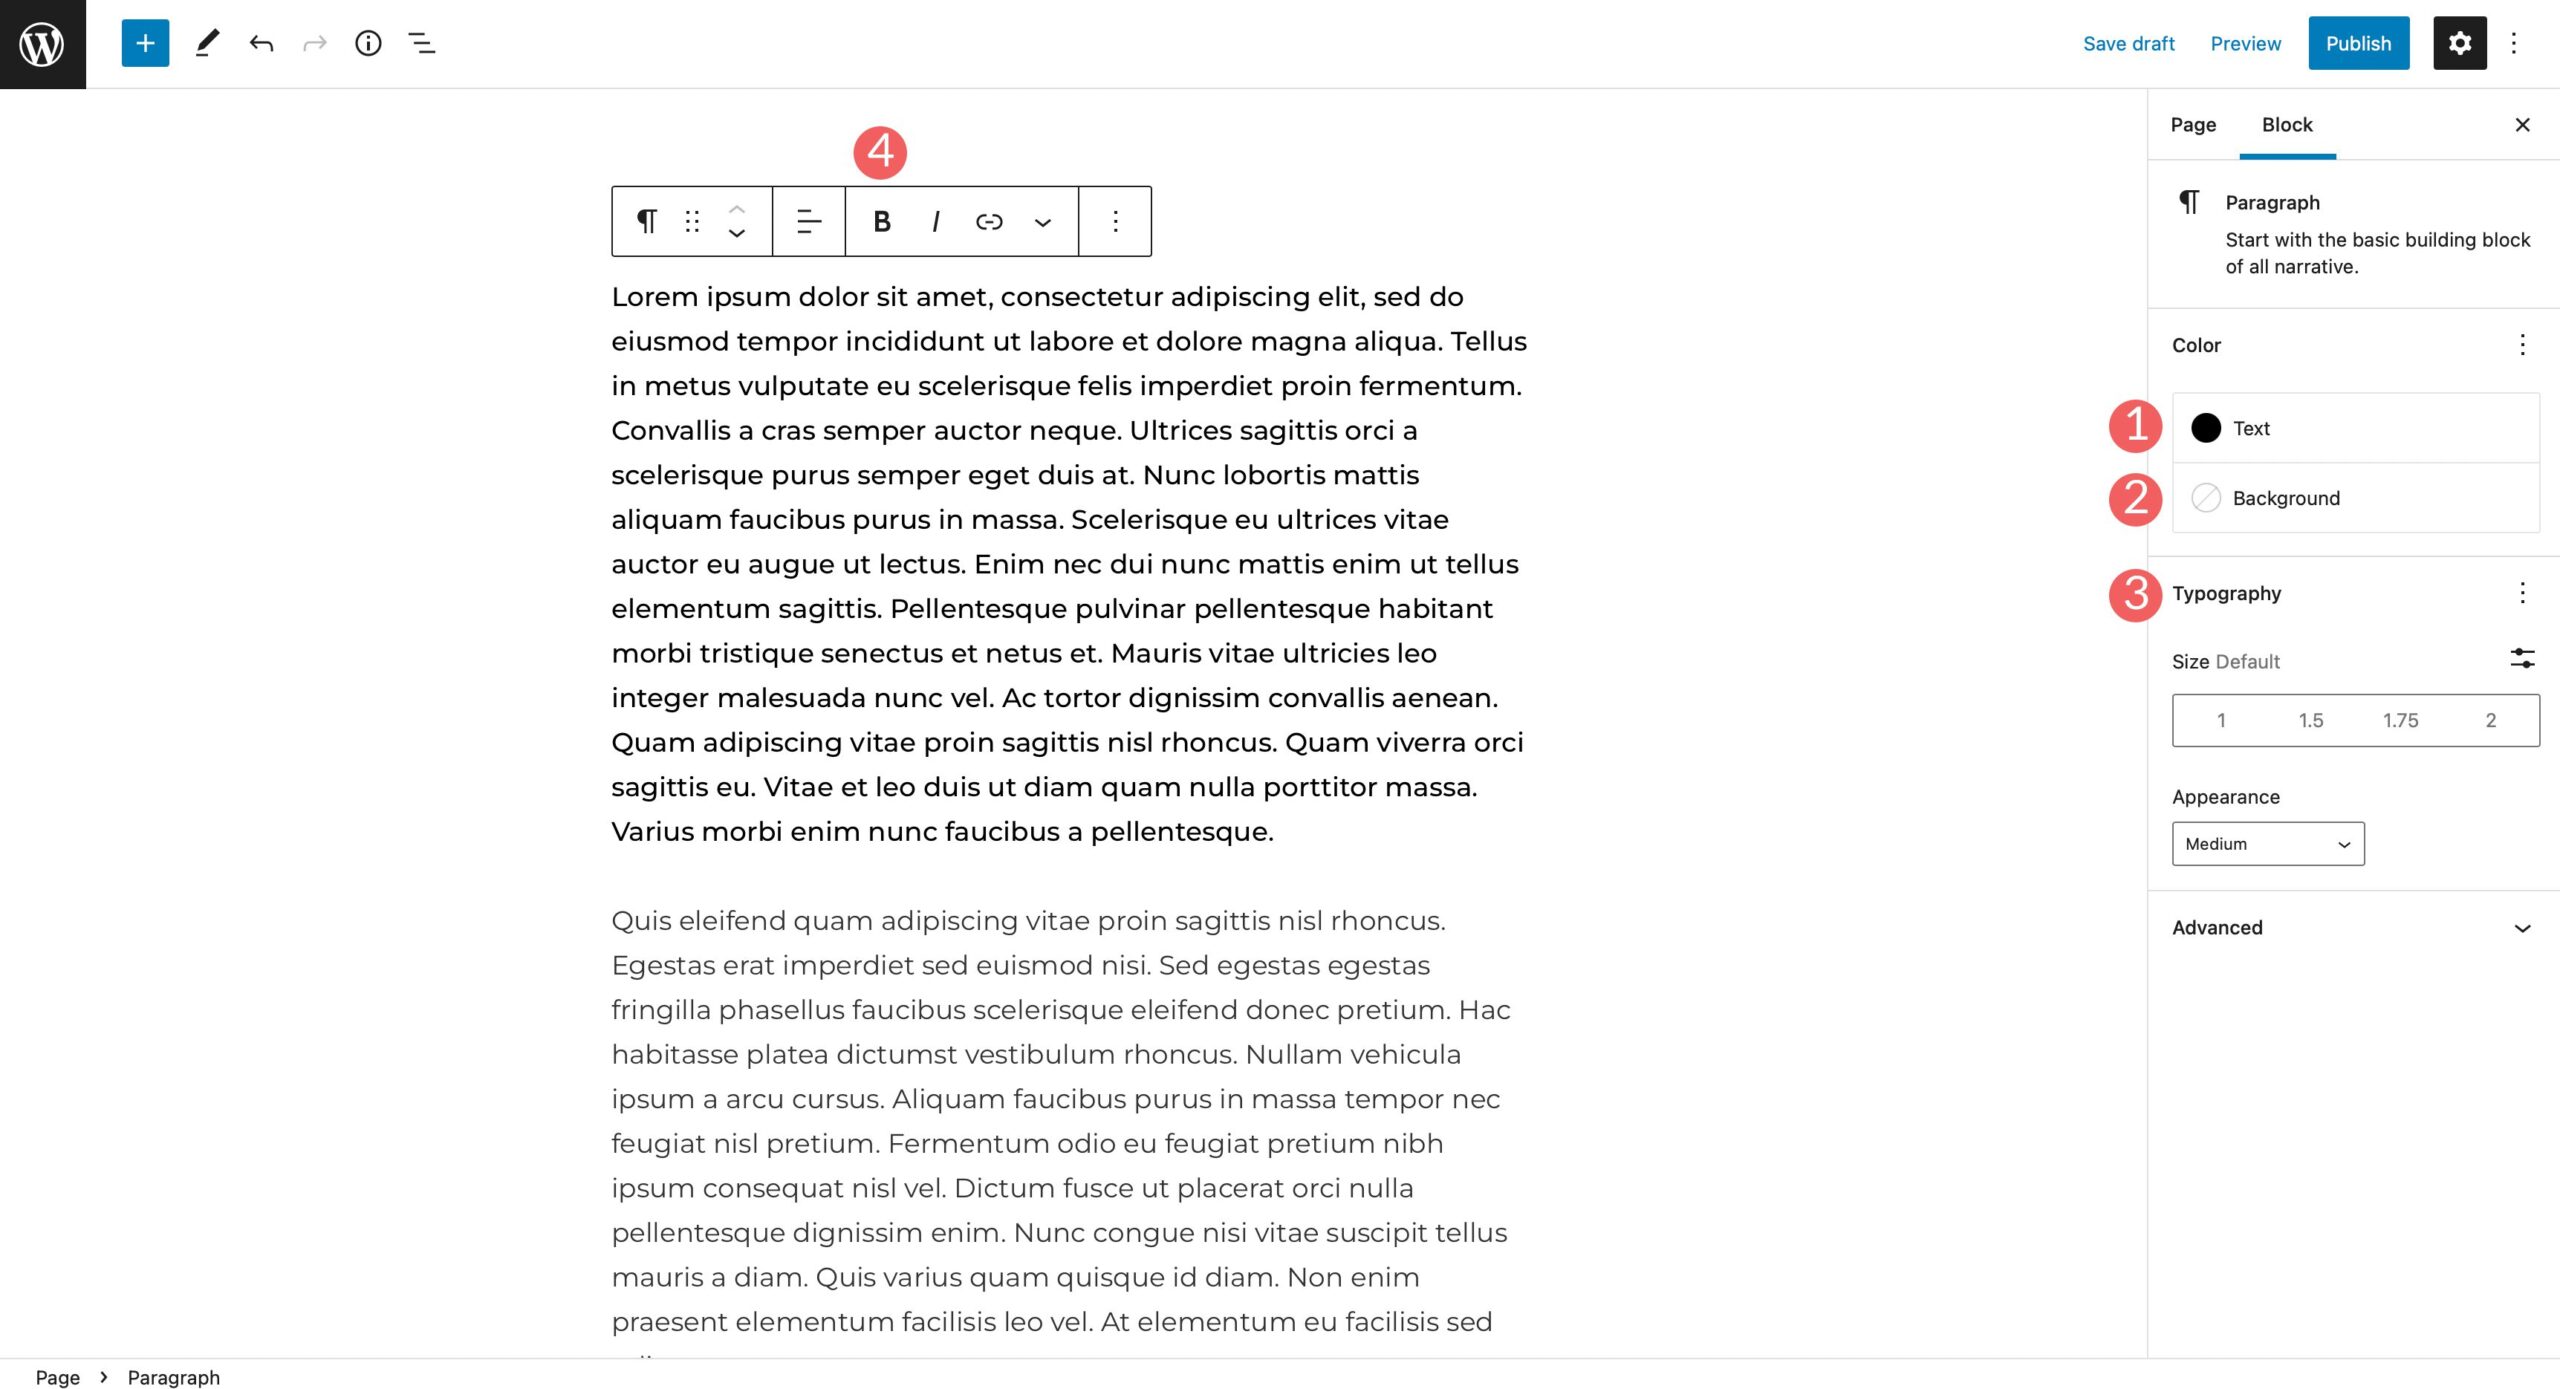
2. Modify Text and Background Colors
In the post or page, select the specific text block you want to alter. The block's settings in the sidebar allow you to easily change the text and background color.
3. Adjust Font Size and Appearance
After selecting the text block, scroll to the sidebar settings and adjust the font size. This is where you can set your desired font size, helping your text fit perfectly within your design.
4. Enhance Text Styling
You can add text features like superscripts or subscripts to further customize. These elements are helpful for specialized content like formulas or technical writing.
5. Save Your Changes
Once you've adjusted the font, click Save or Update to apply the changes to your post or page.
Also Read: How to Add or Change a Favicon in WordPress?
Method 4: Using a Plugin to Change Fonts in WordPress
A plugin is a great alternative if you're still not finding the font you're looking for after trying the previous methods. The Google Fonts for WordPress plugin is one of the most popular tools for adding more font choices to your site. It offers access to thousands of fonts directly from the Google Fonts library.
Here's how you can quickly set it up:
1. Install the Plugin:
Go to your WordPress dashboard, navigate to Plugins > Add New, search for Google Fonts for WordPress, and hit Install Now.
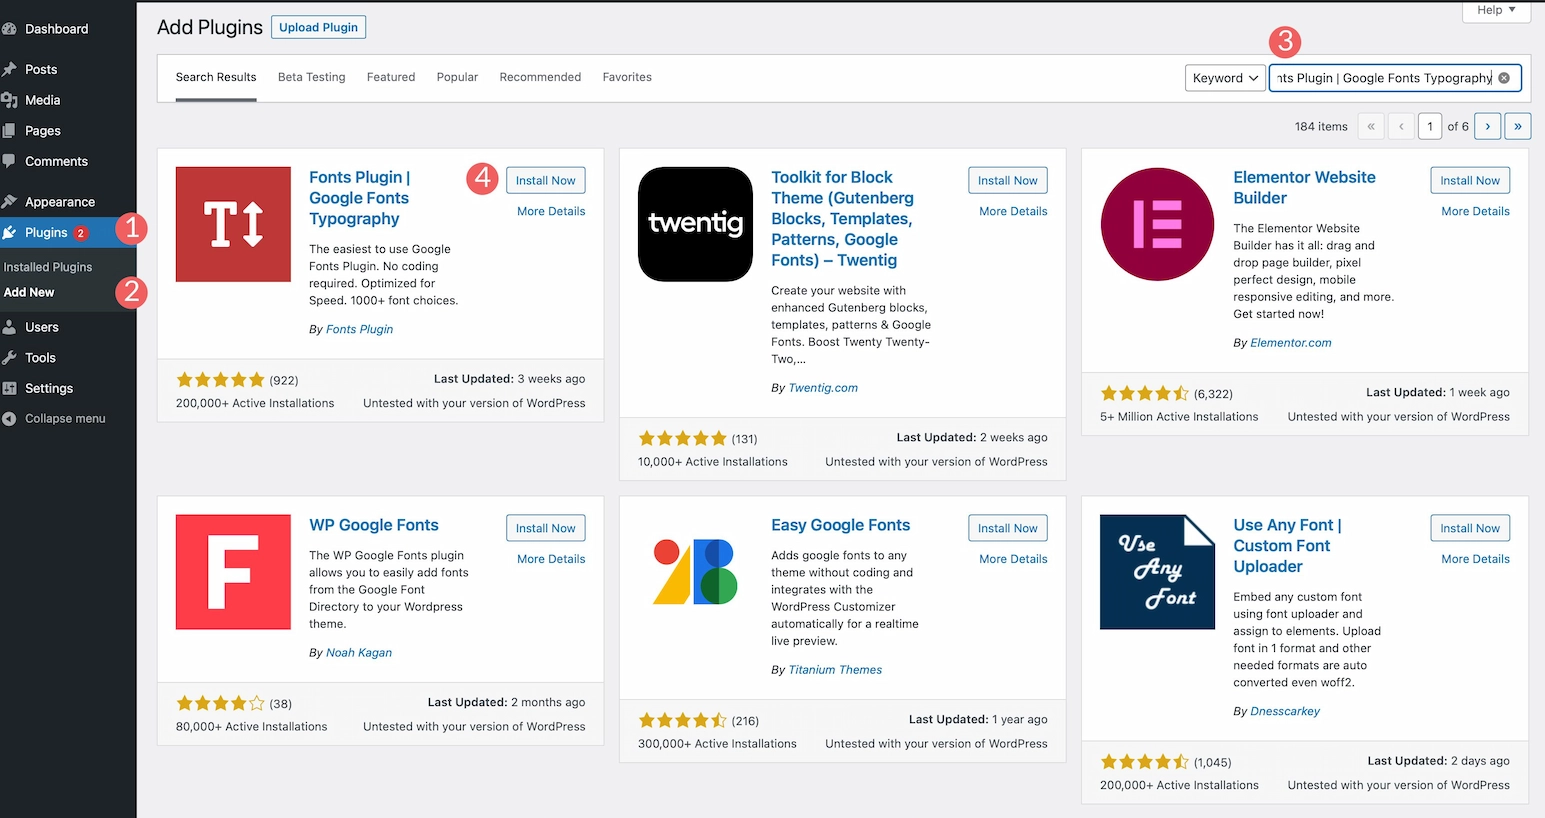
2. Activate and Access the Plugin:
Once installed, activate the plugin and head to Appearance > Customize. You’ll now see a new Fonts Plugin section.
3. Select and Customize Fonts:
- Basic Settings: Choose from over 1,400 fonts, selecting the perfect one for headings, buttons, and paragraphs.
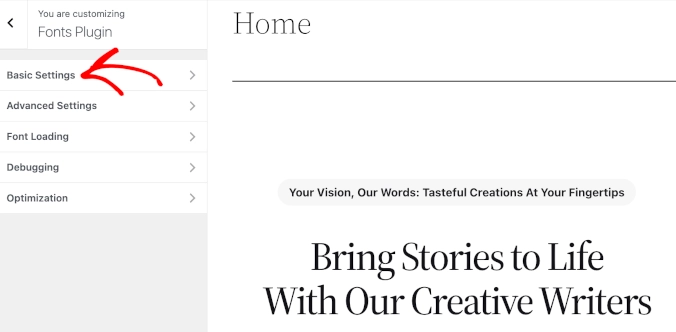
- Advanced Settings: If you want to tweak things further, you can adjust the font settings for your site’s title, tagline, and navigation menus.
- Customize fonts in size, weight, color, and line height to fit your design goals.
4. Pro Version for More Power:
The Pro version gives you more control, such as hosting fonts locally, optimizing font loading times, and even uploading your own custom fonts.
5. Publish Your Changes:
Once everything looks good, click Publish or Update to save your settings. You can always hit the Reset button to return to the default font settings if needed.
Method 5: Manually Adding a Custom Font in WordPress
For users familiar with theme file editing, manually adding a custom font in WordPress can be a smooth process. However, if you are new to this, it's essential to be cautious and take the necessary precautions.
What You Need To Be Cautious Of?
We recommend working with a child theme to make changes. This will protect your site from potential issues caused by errors in the theme files. Also, remember that manually adding a custom font provides limited options. However, it does offer more control and avoids the bloat that can slow down your website when using plugins.
First, ensure you have basic coding skills and an understanding of the WordPress file structure. You will also need an FTP program (like FileZilla) and a code editor.
We will walk you through the process using Google’s Roboto font as an example.
Step 1: Select Your Font
First, head over to Google Fonts and find the font you want to use. For this example, we’ll use Roboto.

Choose the specific font weights (styles) you need, then copy the embed code provided.
Step 2: Enqueue the Font
The next step is to link the font to your WordPress site. We’ll use the Google font in your child theme’s functions.php file. Enqueuing ensures that the font is loaded efficiently and reduces the chances of performance issues.
1. Open your FTP program (e.g., FileZilla) and connect to your site.
2. Navigate to /public_html/wp-content/themes/yourthemechild/ and open the functions.php file.
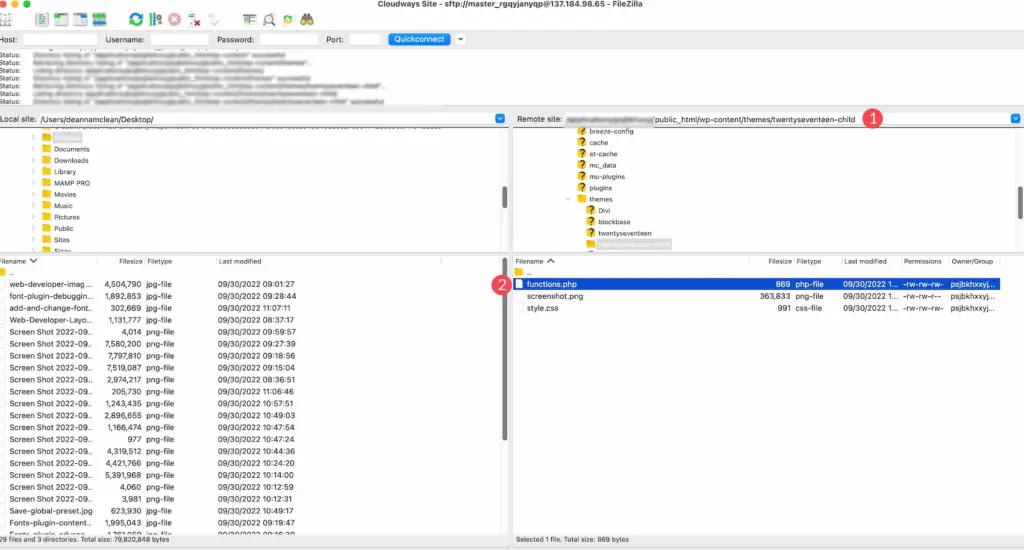
3. Add the following code at the end of the file:
function add_my_font() {wp_enqueue_style( 'add_my_font', 'https://fonts.googleapis.com/css2?family=Roboto:wght@100;300;400;500;
700;900&display=swap', false );}
add_action( 'wp_enqueue_scripts', 'add_my_font' );
Replace yourthemechild with the name of your child's theme. This code tells WordPress to load the Roboto font whenever your website is accessed.
Step 3: Apply the Font with CSS
Now that the font is linked to your WordPress site, the next step is to tell WordPress where to apply it. You can achieve this by modifying the style.css file in your child theme.
1. Locate the style.css file in your child theme’s folder.
2. Add the following code to define where the font should appear:
.body, .h1, .h2, .h3, .h4, .h5, .h6 { font-family: 'Roboto', sans-serif;}
This code ensures that the Roboto font is applied to the body text and all header elements (h1 to h6) on your site. You can adjust this rule to target specific areas of your site as needed.
Step 4: Test the Changes
Once you've added the code, save the changes and refresh your website. The process is successful if you see the desired font applied throughout your site. If it doesn't work immediately, check for theme-specific nuances.
You might need to use the browser's inspection tool to identify the correct CSS selectors or consult your theme's documentation for further assistance.
Now that we've covered all the methods for changing a font in WordPress, it's important to remember a few tips, as prevention is always better than cure.
Also Read: 5 Signs Your WordPress Site Maintenance Needs Attention.
Additional Tips on How to Change a Font in WordPress
Here are some additional tips to ensure you’re making the most of your font changes:
Optimize Your Fonts for Performance
Using fonts (especially Google Fonts or other web font providers) can slow down your website if not optimized. Limiting the number of font families you use can make a noticeable difference in page load times. The fewer font families, the less your site has to load.
Fewer font styles also contribute to better performance, so try to minimize using different font weights and styles.
Choose the Right Fonts for Your Site
While web fonts enhance your site's visual appeal, it is imperative to choose legible and appropriate fonts for your design. Not all fonts work well together. Avoid pairing similar font types, like two-serif fonts, as they can make your content overwhelming and hard to read.
Instead, mix up font styles, such as pairing a serif font for headings with a simple sans-serif font for body text. This creates a good balance and keeps the content readable.
Keep Accessibility in Mind
Accessibility should be a top priority when selecting fonts for your website. Ensure your site is usable for people with visual impairments. A general guideline is to use at least 16px for body text to ensure readability. Buttons should also have prominent, legible text that’s easy to click, even for those with visual challenges.
Accessible fonts, such as sans-serif fonts, can enhance the user experience. Always consider how your text appears across various devices to ensure that it’s clear and comfortable to read for all users.
Limit the Number of Fonts
Using multiple fonts can make your site look cluttered and unprofessional. Stick to no more than two or three fonts: one for headings, one for body text, and possibly one for accents.
This helps to keep your site looking organized while also improving readability. Too many fonts can affect your site's load time and the overall user experience, so it’s best to keep it simple.
Focus on Web-Safe Fonts for Universal Compatibility
Not all fonts will render the same way on every device and browser. Use web-safe fonts whenever possible to ensure consistency across different platforms. These fonts come pre-installed on most devices, so they don’t need to be downloaded.
This can help prevent any issues with font rendering and ensure your website looks great across desktop and mobile devices.
Consider Brand Identity
Fonts are an important part of your brand identity. They should reflect the tone and message of your website.
For example, a playful and creative site may opt for a more decorative font, while a corporate or professional website should use something more formal and straightforward.
Fonts reinforce your brand’s voice, so ensure the ones you choose match your overall style and purpose.
Use Plugins for Easy Customization
If you want to change fonts without exploring the code, plenty of plugins are available. For example, Easy Google Fonts allows you to integrate and customize fonts directly from your WordPress dashboard.
This option is ideal for beginners or those who prefer not to touch CSS files. It gives you flexibility and control without needing coding knowledge.
Verify Font Licensing
Before using a font, check whether it’s free for use, especially for commercial purposes. Some fonts require licensing, and using them without permission can lead to legal issues.
Review the font’s terms and conditions to confirm that it meets your usage needs, particularly if your site is for business.
Quick Reference: Ways on How to Change a Font in WordPress
For those who want a quick glance, here’s a table summarizing different ways to change fonts in WordPress:
| Method | Description | Best For |
| Theme Customizer | Adjust fonts using built-in WordPress customization tools. Navigate to Appearance > Customize > Typography. | Users with themes that support the Customizer. |
| Full Site Editing (FSE) | Modify fonts via the WordPress Full Site Editor. Go to Appearance > Editor and access typography settings. | Users with block-based themes (e.g., Twenty Twenty-Two). |
| Block Editor | Change fonts directly within posts and pages. Select a text block and adjust typography in the settings sidebar. | Quick, per-page font changes without plugins. |
| Plugins | Install plugins like Google Fonts for WordPress to access thousands of font options and advanced settings. | Users wanting more font choices and easy customization. |
| Custom Fonts (Manual Method) | Upload and add custom fonts by modifying CSS or theme files. Requires adding @font-face rules. | Advanced users comfortable with CSS and theme editing. |
Putting It All Together: Your Guide to Change Fonts in WordPress
Now that you know how to change a font in WordPress, you’re ready to elevate your website’s design. Whether you’ve used the built-in WordPress Customizer or a plugin, the flexibility is all yours. Just remember, fonts are more than just decoration.
They impact readability, accessibility, and overall user experience.
Remember the balance between aesthetics and performance as you experiment with different font combinations. If you’re unsure, always prioritize legibility and site speed. And if this all feels like a lot to manage, don’t worry; you don’t have to do it alone.
SiteAim is here to help. We specialize in WordPress maintenance and support, ensuring your website looks great and functions flawlessly.
Reach out to us for hassle-free WordPress support tailored to your needs.
FAQs
1. Why can't I change my WordPress font?
If you can't change your font, it might be due to theme restrictions or conflicting settings in your WordPress customizer. Ensure you’re using a theme that supports font customization, or try adding custom code if necessary.
2. How do I change the text format in WordPress?
To change the text format, simply use the editor's formatting options. You can adjust headings, paragraph styles, bold, italics, and alignment directly in the visual editor or through custom CSS for more control.
3. How do I change the font in WordPress without plugins?
Changing fonts without plugins requires editing your theme's CSS. You can add custom CSS code in the WordPress customizer to apply new fonts or make changes to existing ones, but it’s best if you're comfortable with basic coding.
4. How many fonts should I use?
It’s best to stick to 2-3 fonts for a clean, professional look. Use one font for headings, another for body text, and possibly an accent font for smaller details. Too many fonts can clutter your site and harm readability.
5. Can I use downloaded fonts in WordPress?
Yes, you can use downloaded fonts in WordPress, though it involves uploading them to your hosting account and adjusting your CSS. It’s a bit more technical, so be sure you're familiar with the process or follow a detailed guide.
6. Can I change the fonts in the Twenty Twenty-Two theme?
While you can change fonts in the Twenty Twenty-Two theme, it requires editing the theme’s files, such as theme.json and functions.php. This is a more advanced method, so be cautious and back up your site before making changes.