Nobody likes a slow website. A sluggish WordPress site frustrates visitors, hurts SEO rankings, and can even drive potential customers away. Caching is one of the easiest ways to speed things up. It stores static versions of your pages, so they don’t have to be loaded from scratch whenever someone visits.
This reduces server load and improves overall performance.
But caching isn’t always helpful. Sometimes, it prevents updates from showing up immediately, leaving you (and your visitors) staring at outdated content. That’s why knowing how to clear WordPress cache is just as important as setting it up.
In this guide, we’ll break down different types of caching, why it matters, and the best ways to clear it.
Whether you're dealing with browser cache, server-side caching, or WordPress plugins, you’ll learn exactly how to keep your site fast and up to date.
Let’s start by understanding what website caching is.
What Is Website Caching?
“Website caching enables browsers to store website data temporarily, reducing the need to retrieve the same information repeatedly from the server. When a user revisits a site, cached content allows the page to load faster instead of making fresh requests to the backend. This optimizes data delivery and enhances website performance.”
Why Is Web Caching Important?
Caching enhances website speed, but its benefits extend beyond faster load times. It plays an important role in optimizing server performance, improving user experience, and even supporting search engine rankings.
Here’s why caching is imperative:
- Reduces Server Load: A cached webpage allows browsers to display content without constantly fetching data from the server. This reduces requests, lightens the load, and helps maintain uptime during traffic spikes.
- Minimizes Bandwidth Usage: Since static elements like images, style sheets, and scripts are stored locally, users don't have to reload them every visit. This conserves bandwidth and ensures smoother performance, especially on slower connections.
- Enhances SEO Performance: Search engines prioritize page speed in rankings. Since caching improves load times, it supports better SEO visibility and helps websites rank higher.
- Creates a Better User Experience: Visitors expect a site to load quickly. Delays frustrate users and increase bounce rates. A well-cached website keeps navigation smooth and ensures visitors stay engaged.
- Impacts Conversions: Faster load times encourage visitors to interact, reducing abandonment rates. Studies suggest that even a small delay can lead to lost opportunities, making caching an important factor in conversion rates.
While caching delivers these advantages, maintaining it properly is just as important. Clearing the WordPress cache periodically ensures users access the latest updates, prevents performance glitches, and strengthens website security. Keeping a well-balanced caching strategy helps maintain a smooth and efficient site.
Before getting into how to clear WordPress cache, let’s look at how cached pages are served.
How Cached Pages Are Served
Understanding how a web browser serves cached pages requires examining how websites are normally displayed. When a user enters a website’s URL, the browser initiates an HTTP request to the server, asking for the necessary resources to render the webpage.
These resources include HTML, CSS, JavaScript files, images, and other assets that shape the site’s appearance and functionality.
Upon receiving the request, the server compiles the required data into an HTML file and sends it back as an HTTP response. The browser then processes this file and assembles and displays the web page. Without caching, this entire sequence repeats each time a user visits the website.
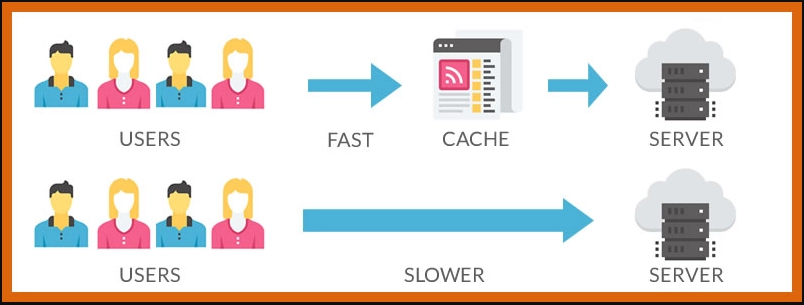
Caching optimizes this process by temporarily storing frequently accessed resources. Instead of fetching data from the server each time, the browser retrieves the cached version. The process unfolds as follows:
- When a website is accessed, the browser first checks its cache to determine whether the required resources are available.
- If the requested data is missing, a cache miss occurs. This prompts the browser to retrieve the necessary files from the server.
- If cached data exists, the browser sends an HTTP request with an entity tag (ETag), which helps verify whether the stored version is still valid.
- The server then checks if an updated version of the requested resource exists. If changes have been made since the last cache save, fresh data is sent. Otherwise, the cached version is used.
This mechanism ensures that users experience faster load times while still receiving the most up-to-date content when necessary.
Now that we understand how caching works, let’s explore the different types of website caching.
Types of Website Caching
Website caching comes in different forms, each designed to improve speed and performance in its own way. Let’s break down the key types you should know.
1. Client-Side Caching (Browser Cache)
Web browsers automatically store static elements of a website (like images and scripts) on a user’s local device. When the visitor returns, the stored data is used instead of being requested again by the server.
This method is highly effective, but it has limitations. Switching devices or clearing the cache results in a fresh request from the server.
2. Server-Side Caching
Instead of making the server process the same requests repeatedly, server-side caching stores processed data and reduces response time. Several types of server caching improve efficiency in different ways:
- Full-Page Caching: Saves a complete page as a static file, reducing the time needed to load frequently accessed pages such as homepages and blog posts.
- Object Caching: Retains database query results, cutting down on redundant data fetching and making dynamic sites run smoother.
- Fragment Caching: Caches parts of a webpage like sidebars, headers, or widgets so that only the dynamic sections require updates.
WordPress Caching Methods
WordPress users can choose from various caching techniques to optimize site performance. Both server-side and application-level caching solutions help reduce load times.
Server-Level Caching
There are different types of server-level caching in WordPress, each designed to handle data more efficiently and improve website speed.
Let’s take a look at the key ones.
- Varnish Cache (Reverse Proxy): Stores entire pages in memory and serves them instantly, considerably reducing server strain.
- Page Cache: Retains entire web pages for quick retrieval. Doing so minimizes database queries and ensures a smoother user experience.
- Redis (Database Caching): Saves query results in memory to avoid repetitive database calls.
- Memcached (Object Caching): Works as an in-memory caching layer that helps dynamic websites load faster by reducing database load.
- Opcode Caching: Speeds up PHP execution by storing precompiled scripts in memory.
- CDN Cache: A Content Delivery Network (CDN) serves cached content from the closest geographical server, reducing latency and improving global site performance.
Application-Level Caching
Here are the key types of WordPress application-level caching that help improve performance and reduce server load.
- Browser Caching: Stores static elements like images, style sheets, and scripts in a visitor’s browser, reducing the need for repeated requests.
- WordPress Caching Plugins: Tools like WP Rocket, W3 Total Cache, and LiteSpeed Cache simplify caching for WordPress users by automating cache management and performance optimization.
Now that we’ve covered everything about caching and WordPress caching, let’s move on to how to clear the WordPress cache.
Also Read: cPanel for WordPress: The Ultimate Guide to Website Management.
How to Clear WordPress Cache
Here are some ways to clear your WordPress cache and ensure your visitors see the latest version of your site without any outdated elements getting in the way.
Method 1: How to Clear WordPress Cache Using Web Browser Cache
A web browser saves static elements like images, style sheets, and scripts to speed up site loading. While helpful, this can lead to outdated content being displayed instead of the latest updates.
To clear the cache in Google Chrome:
- Click on the three-dot menu in the top-right corner.
- Select More Tools > Clear Browsing Data.
- Choose a time range (select All Time to remove everything).
- Check the box for Cached images and files.
- Click Clear Data.
After completing these steps, refresh your WordPress site. If updates still don’t appear, try using an incognito window or a different browser to confirm the cache has been cleared properly.
Method 2: How to Clear WordPress Cache Using Plugins
Caching plugins simplify cache management by providing a dedicated dashboard to handle everything in one place. Different plugins offer varying features, but all allow you to clear cached files with just a few clicks.
Below are the methods for clearing the cache using popular WordPress caching plugins.
1. Clearing Cache with LiteSpeed Cache

LiteSpeed Cache offers advanced caching options, making it a preferred choice for users on LiteSpeed-powered hosting.
Here are the steps to clear cache in LiteSpeed Cache for those wondering where to clear WordPress cache.
- Install and activate the LiteSpeed Cache plugin.
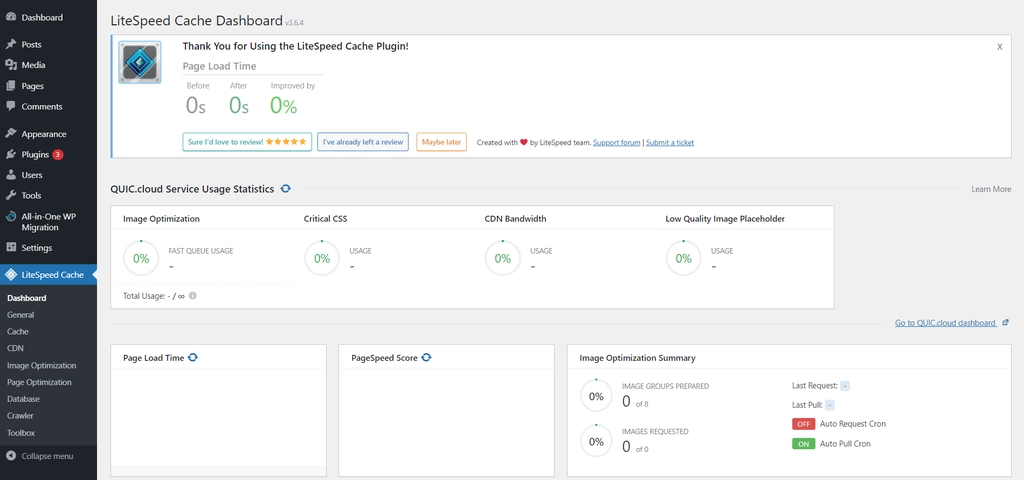
- Access your WordPress admin dashboard and navigate to LiteSpeed Cache in the menu.
- Click on the Toolbox section to open cache management settings.

- Choose the type of cache you want to clear. Options include page cache, CSS/JS cache, and more.
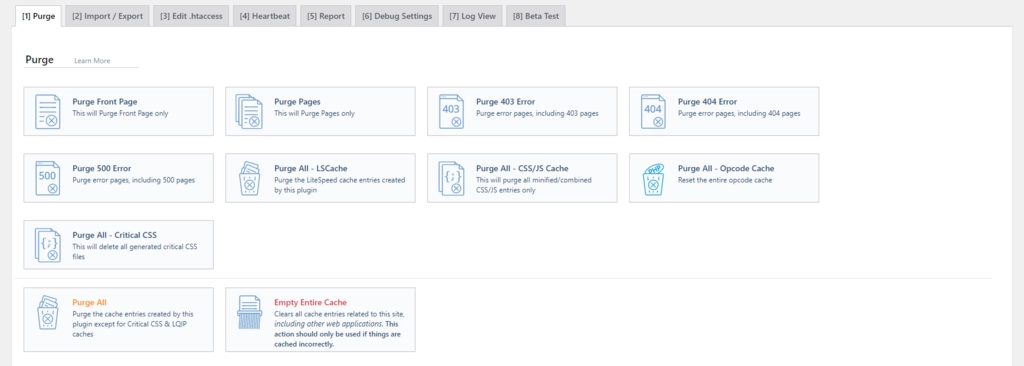
- Select Purge All if you want to remove all cached files. This will not affect your website’s critical data.
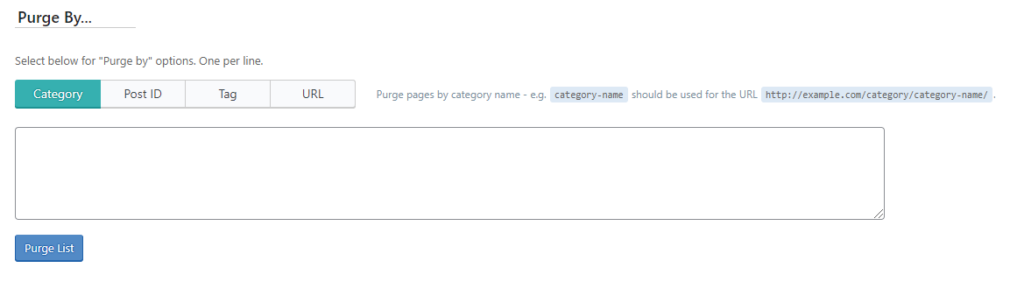
- To clear cache for specific parts of your site, use the Purge By section, where you can enter a category, tag, or URL.
- If you need to clear the cache for a single page, visit the page while logged in as an administrator, hover over the LiteSpeed icon in the admin bar, and select Purge this page.

2. Clearing Cache with WP Rocket
WP Rocket is a premium caching plugin known for its automatic cache management. It ensures that visitors always get a fast-loading version of your site by proactively building a cache in the background.
Steps to clear cache in WP Rocket for those looking how to clear cache from WordPress.
- Open your WordPress admin dashboard and go to Settings → WP Rocket.
- Locate the Clear Cache button in the plugin dashboard.
- Click Clear Cache, and WP Rocket will remove all cached files from your website.
Since WP Rocket automatically handles caching, manual clearing is usually not necessary. However, this option helps when changes don’t reflect immediately.
3. Clearing Cache with WP Super Cache
WP Super Cache is a widely used free caching plugin that helps improve website performance by storing static versions of pages.
Steps to Clear Cache in WP Super Cache
- Open your WordPress admin dashboard and navigate to Settings → WP Super Cache.
- Scroll to the Delete Cached Pages section.
- Click the Delete Cache button.
- WP Super Cache will now remove all cached content from your site.
This method is useful when changes to your site aren’t immediately visible to users.
4. Clearing Cache with W3 Total Cache
W3 Total Cache is a feature-rich caching plugin that enhances site performance by reducing load times. It allows you to clear all cached data with a single action.
Steps to Clear Cache in W3 Total Cache:
- Open your WordPress admin dashboard and go to Performance → Dashboard.
- Locate the Empty All Caches button at the top.
- Click Empty All Caches, and W3 Total Cache will remove all stored cache files.
This ensures that visitors see the latest version of your website without any outdated cached elements.
Method 3: How To Clear WordPress Cache Using Your WordPress Hosting
Some hosting providers offer built-in caching to enhance website performance. Clearing this cache ensures visitors see the latest updates without any lag.
Below are the steps for some of the most widely used WordPress hosting services.
1. Clearing Cache in Bluehost

Bluehost includes an integrated caching system that helps improve loading speeds. If recent changes aren’t appearing on your site, follow these steps if you're wondering how to clear the WordPress site cache.
- Log into your WordPress admin dashboard.
- Locate the ‘Caching’ button in the top admin toolbar.
- Hover over it and click ‘Purge All’.
That’s it. Bluehost will immediately clear the stored cache, allowing fresh content to be displayed to users.
2. Clearing Cache in SiteGround
SiteGround provides a built-in caching solution that enhances website speed. You can clear the cache through the hosting control panel or the WordPress admin area.
1. Clearing Cache via SiteGround Control Panel
- Log into your SiteGround hosting account.
- Navigate to Speed » Caching under the Site Tools section.
- Select ‘Dynamic Cache’ from the menu.
- Click the menu icon next to your domain name and choose ‘Flush Cache’.
2. Clearing Cache Using the SG Optimizer Plugin
Another way to manage SiteGround’s cache is through the SG Optimizer plugin. Here’s how:
- Install and activate the SG Optimizer plugin.
- Once activated, find the ‘Purge SG Cache’ button in the WordPress admin toolbar.
- Click the button to clear the cache instantly.
3. Clearing Cache in WP Engine
WP Engine comes with an advanced caching system designed to optimize WordPress performance. If changes aren't reflected on your site, clearing the cache can help.
Follow these steps to learn how to clear cache on WordPress.
- Log into your WordPress admin dashboard.
- Click on the WP Engine option in the left-hand menu.
- Under the General Settings tab, find the ‘Purge All Caches’ button.
- Click it, and WP Engine will remove all cached data.
This ensures visitors see the latest version of your website immediately.
4. Clearing Cache in Kinsta
Kinsta provides a robust caching system to keep WordPress sites running smoothly. If updates aren’t appearing, clearing the cache can resolve the issue. Here’s how:
1. Using MyKinsta Dashboard
- Log into your MyKinsta dashboard.
- Select your website from the list.
- Click on the Tools tab.
- Find the Clear Cache option and click the ‘Clear Cache’ button.
2. Using the Kinsta MU Plugin
Kinsta also offers a WordPress plugin to clear cache directly from the admin panel:
- Log into your WordPress admin dashboard.
- Locate the Kinsta Cache option in the top admin toolbar.
- Click ‘Clear Cache’ to remove stored data.
5. Clearing Cache in Cloudways
Cloudways offers a built-in caching solution through its Breeze plugin and platform-level cache management. If recent changes aren’t showing up, follow these steps to clear the cache.
1. Using Cloudways Platform
- Log into your Cloudways dashboard.
- Select your server and click on the Applications tab.
- Choose your website and navigate to Application Management.
- Under the Manage Services section, find Varnish and click ‘Purge’ to clear the cache.
2. Using Breeze Plugin
Cloudways pre-installs the Breeze caching plugin for WordPress. Here’s how to use it:
- Log into your WordPress admin dashboard.
- Go to Settings » Breeze.
- Click the ‘Purge Cache’ button.
This ensures that visitors see the latest version of your site without delays.
Method 4: How to Clear WordPress Cache Using Firewall Plugin Cache
If a firewall plugin like Sucuri is used, an extra caching layer must be cleared to reflect recent changes. Follow these steps to do it:
- Log in to the WordPress admin dashboard.
- Navigate to Sucuri » Firewall (WAF) from the side menu.
- Locate the ‘Clear Cache’ option.
- Click the ‘Clear Cache’ button to remove stored firewall data.
Bonus Tip: Clear DNS Cache (If Applicable)
If the website was recently migrated, clearing the DNS cache ensures that updated records are retrieved. This prevents the system from loading an outdated version of the site.
Also Read: 11 Best WordPress Forum Plugins to Build Online Communities.
How to Clear Cache from WordPress: A Tabular Overview
| Method | Steps |
| Clear Browser Cache | 1. Open browser settings → More Tools → Clear Browsing Data. 2. Select a time range (choose "All Time" for a full reset). 3. Check "Cached images and files." 4. Click "Clear Data" and refresh your site. |
| Clear Cache with LiteSpeed Cache Plugin | 1. Go to WordPress Admin → LiteSpeed Cache. 2. Open "Toolbox" settings. 3. Choose "Purge All" or clear specific caches (page cache, CSS/JS cache, etc.). |
| Clear Cache with WP Rocket Plugin | 1. Go to WordPress Admin → Settings → WP Rocket. 2. Click "Clear Cache" to remove all cached files. |
| Clear Cache with WP Super Cache Plugin | 1. Go to WordPress Admin → Settings → WP Super Cache. 2. Scroll to "Delete Cached Pages." 3. Click "Delete Cache." |
| Clear Cache with W3 Total Cache Plugin | 1. Go to WordPress Admin → Performance → Dashboard. 2. Click "Empty All Caches" to remove all stored cache files. |
| Clear Cache via WordPress Hosting (Bluehost, SiteGround, etc.) | 1. Access the hosting control panel. 2. Navigate to caching settings. 3. Click "Clear Cache" or use the hosting provider's cache management tool. |
How to Clear WordPress Cache and Why It’s Only Half the Battle
Clearing your WordPress cache is a quick way to fix display issues and improve speed, but it’s only part of the equation. A truly optimized website needs regular upkeep like monitoring performance, tightening security, and ensuring seamless user experience.
For businesses that don’t have the time to stay on top of these technical details, SiteAim provides the expertise to keep everything in check.
Instead of worrying about slow load times or outdated content, you can focus on what really matters. We help you grow your business while your website runs at its best.
Contact us today to get the best management services ever!
FAQs
Q: Where is my WordPress cache located?
WordPress cache files are typically stored in the wp-content/cache/ directory. However, their exact location depends on the caching plugin or method you're using. Some hosting providers also implement server-level caching, which may not store cache files within your WordPress directory.
Q: Is it safe to clear the cache in WordPress?
Yes, clearing the cache in WordPress is generally safe and often recommended. It helps ensure that visitors see the most recent content and can resolve issues like outdated pages or changes not appearing as expected.
Q: How do I clear my WordPress REST API cache?
To clear the REST API cache in WordPress, you can use a caching plugin that offers this feature. For instance, plugins like W3 Total Cache allow you to purge the REST API cache from their settings. Also, some hosting providers offer server-level caching controls that can clear REST API caches.
Q: What does WP cache flush do?
Flushing the WordPress cache clears all stored cached data, forcing the system to rebuild it. This action helps display recent changes and maintain optimal site performance.
Q: How do I clear the cache in the WordPress Redirection plugin?
The WordPress Redirection plugin doesn't include a built-in caching mechanism. If you're experiencing caching issues related to redirects, consider clearing your site's overall cache through your caching plugin or hosting provider's cache management tools.
Q: How do I manually delete cache files in WordPress?
To manually delete cache files, access your site's files via FTP or your hosting control panel, go to the wp-content/cache/ directory, and delete its contents. Be cautious when performing this action, as improper file deletion can affect site functionality.